Pretty Boxes
ezguide
easy to follow step by step guides
easy to follow step by step guides
Often clients want to emphasise a particular statement or draw their visitor's eye to a Special Offer. Using the instructions set out in this guide it is now possible to easily make an eye catching Testimonial Box or a Special Offer Icon to make that important piece of information stand out.
Normally we'd recommend a cautious approach to putting "bells and whistles" on a website, as it is very easy to distract from the main message. You may have seen websites where you suspect the designer indulged themself in the latest technology, and there are so many things popping up or sliding over each other, you can't find what you need.
On occasion though, you do want an element of your web page to draw attention and stand out. This can even aid reading, and break up the monotony of a page of text. A nice image is good, but sometimes you will want text to stand out. Such as for:
In the past you would have needed a designer or someone with graphics software skills to make these for you, but now there are many web based tools that will allow you to do this yourself for free. One that we have tested out and worked well for us is www.bannerfans.com
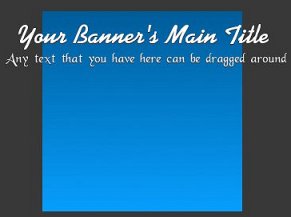
Having logged on to www.bannerfans.com you will see that the top half of the webpage contains a banner area where you will be able to view the changes taking effect as you go through the stages of creating your own banner.
The bottom half of the website page contains the tabs which you can select to create the effects as you design your banner. There are a selection of tabs to work through starting with layout, progressing through text and fonts, shadows and effects, border and format.
There are three main steps to creating a simple testimonial box and these are:
1. Setting the size and colour of the box
2. Entering the text into the box
3. Saving your newly created box
In the bottom left hand corner of the website you will see the Layout Tab which allows you to choose the size of your testimonial box. Not all sizes are compatible with your web page and the one we would recommend you use is the 250 x 250 Medium Square box. Clicking on the coloured box next to the First and Second Colors will bring up a colour palette for you to make your colour selections.
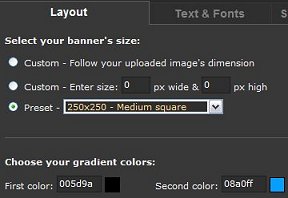
When you have made your selections, click on the "Update my banner" box which you will see towards the bottom of the page in the centre.

Having decided upon your layout and colour specifications, you are now ready to click on the Text and Fonts Tab. Firstly, you will see lines where you are able to insert the text of your choice. As a test, why not try the five line example we have shown below.
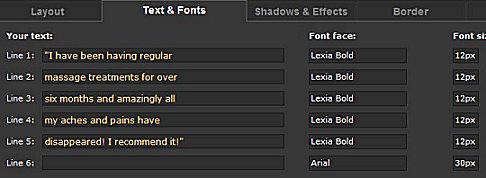
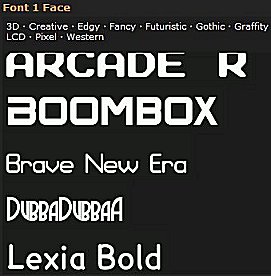
Having inserted your text, each line then requires its font face to be set. You can select the font face by clicking in the Line 1 Font Face box and then the subsequent Font Face boxes down to line five. There are lots of font types available, but we would recommend Rounded for starters.

Having done this you will then be given the Rounded font options and we have selected Lexia Bold.
Next click on the small arrow next to the Font Size box and you will be given a line of font sizes to choose from. We recommend 12px as a good size for a testimonial box. Click "Update my banner" once again. You will now be able to view the new text within the box and you will have the opportunity to move your lines around within the box as you so wish by placing the mouse on a line of text and dragging it to where you want it to be.

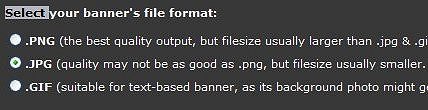
Now select the Format Tab which is right at the end and gives you the options for saving your newly finished testimonial box. Select the .JPEG option as this is most easily uploaded to your website.
Finally, click on the "Save Banner Tab" which is located to the left of the "Update my banner" tab and you will be able to download and save your banner.
The last thing is to upload it to your website image library, as you would any normal image. As you've already set the size when you created it though, just remember to load it in at its original size, as there's no need to resize it when uploading. See Section B1 of our Help Guide for step by step instructions.
Having mastered the technique of creating your own simple testimonial box, you may now find it useful to be able to create an effective Special Offer Icon to draw your visitor's eye to any potential offers you may wish to give prominence to.
There are three main steps to creating a Special Offer Icon and these are:
1. Setting the size and colour of the box
2. Entering the text into the box
3. Saving your newly created box
In the bottom left hand corner of www.bannerfans.com you will see the Layout Tab and this time we would recommend you use a smaller sized box. We have chosen the 125 x 125 Large Button box shown below. Next choose the colour and gradient of your box. For this example we have chosen yellow as the First colour and red as the Second colour with a Square Gradient mode. Remember to click on "Update my changes" to save your work.

Moving along to the Text and Font Tab, insert the text you wish to see displayed and choose the Font Size and Font Type. You will see we have chosen Brrrr Regular, found under Creative in the Font menu and Coolvetica, found under Rounded in the Font menu to achieve the text in this example with a font size of between 12 and 14 point size.
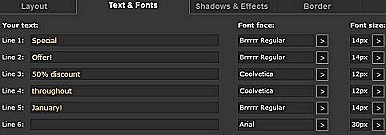
Once you have clicked on "Update my changes" you will be able to move your lines of text around to suit the effect you are trying to achieve.

Now select the Format Tab which is right at the end and gives you the options for saving your newly finished testimonial box. Select the .JPEG option as this is most easily uploaded to your website.
Finally, click on the Save Banner Tab which is located to the left of the "Update my banner" tab and you will be invited to register and save your banner.
Once again, you just need to upload the image into your website image library at its original size, and you can use it on your website.
Once you are familiar with the above steps and comfortable with creating your box, you may have the confidence to try a few more advanced effects if you wish. These are:
1. Adding Shadows and Effects to your text.
2. Adding a Border to your box.
Click on the Shadows and Effects Tab and you will be given a selection of choices to experiment with in order to achieve more striking effects in either your Testimonial Box or you Special Offer Icon. In the example below we have added a top right 2px shadow offset colour of grey to lines three and four of our Special Offer Icon.
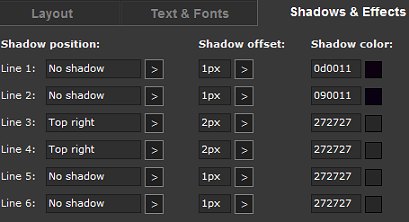
When you click on "Update my changes" you will see the changes take effect on lines three and four, with the shadow effect adding extra emphasis.

Click on the Border Tab, and you will have a choice of four borders to select from.

We have chosen a double dashed border to add further emphasis. You may also choose colours and thickness of border to give your Special Offer Icon a really professional finish.